| How
to improve the berg... |
|
|
|
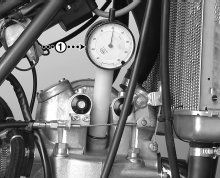
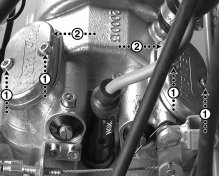
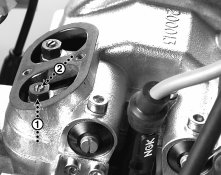
Valve adjustment: Remove the fuel tank (see "FUEL & COOLING - FUEL"). Also remove the radiator (Owner's experience make it adviseable). Put the engine in TDC position on compression stroke: Remove the ignition cover, install a dial indicator into the spark plug hole (Fig. 7K-1) and turn the flywheel (wrench No. 17), clockwise, in order to find the upper position of the piston. (Additional procedure place a long screwdriver inside the spark-plug hole if not dial indicator is avaliable). Remove the two valve inspection covers (Fig. 7L-1, 2, allen key No. 4) including the gaskets. Check the clearances of the valves; 0.10 mm on both the intake valves as well as the exhaust valves. Adjust if necessary by releasing the lock nut (Fig. 7M-1, wrench No. 10) and then by adjusting the screw (Fig. 7M-2) into the adequate clearance. Refit in the reverse order of disassembly. Replace the gaskets of the inspection covers if necessary.
|
||
|
|
||

web desing by: dctools
April 2000